Using a legacy Replicon timesheet
Before releasing the current version of Replicon, we offered another 'legacy' version that some customers still use. This legacy version is in some ways exactly like the current version, but it also differs in some ways.
An easy way to tell if you're using an older timesheet is to check whether it includes a Quick Fill With button; Legacy timesheets do not offer Quick Fill With options (though they do offer a Copy From feature).
The content below applies solely to legacy timesheet formats. See the note at the end of each section for information on equivalent features in the latest version of Replicon.
Selecting projects and tasks on your timesheet
Are you using a later version of Replicon?
If this field looks different on your timesheet, see Selecting projects and tasks on your timesheet instead.
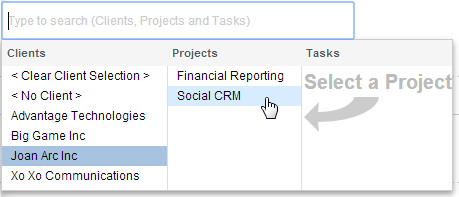
In some versions of the timesheet, you’ll select projects and tasks using the Client · Project · Task field shown below. This field acts as both a search and a filter field. This field may be set up to filter by program instead of by client.
For some projects, you can choose to enter time against the project as a whole, instead of against a task.
Searching for a project or task
To search for a project or task:
- In your timesheet, click the Client · Project · Task field where you want the task to appear.
- Enter the name of the task, or some part of it.
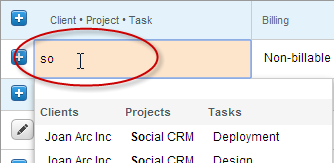
All clients, projects, and tasks that match the search term you’ve entered will display in the drop-down.
- Select the task name from the filtered list.
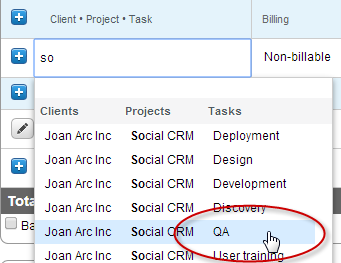
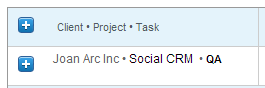
The task name displays in the Client · Project · Task field.
Filtering to find a project or task
To filter by client and project:
- In your timesheet, click the Client · Project · Task field where you want the project to appear.
- In the drop-down table that displays, select the project’s client from the Client column.
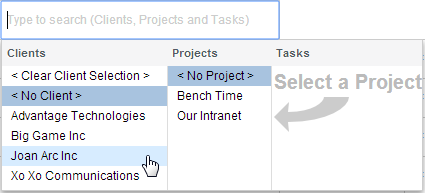
Projects for that client display under the Projects section.
If a project you worked on is associated with multiple clients, only one of the clients will display in the task selector.
- Select a project name from the Projects column.
Tasks for that client display under the Tasks section.
- Select the task.
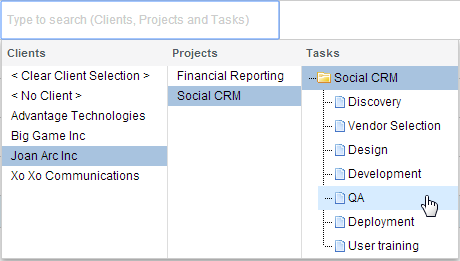
The task name displays in the Client · Project · Task field.
This field may be set up to search only, and not to filter by client or program.
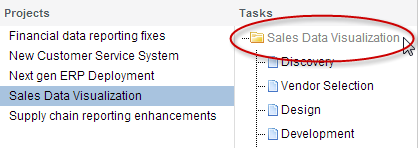
Entering time at the project level
For certain projects, you may be allowed to enter time against the entire project as a whole, or against tasks within that project. For other projects, you may only be allowed to enter time against tasks.
To enter time against a project as a whole, first select the client and project. Then, under the Tasks column, select the project’s name. It should display next to the ![]() icon.
icon.
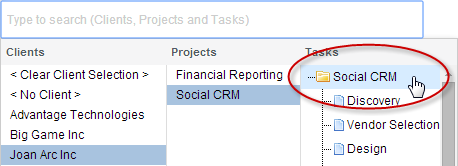
If you are not allowed to enter hours at the project level and can only enter hours against specific tasks, the project name under the Tasks column will be grayed out.
The content below applies solely to legacy timesheet formats. See the note at the end of each section for information on equivalent features in the latest version of Replicon.
Copying from another timesheet
Are you using a later version of Replicon?
If you do not see the Copy From option, you may have access to the Quick Fill With button.
You can save yourself time when completing your timesheet by copying data you’ve entered in one of your existing timesheets. You can choose to copy time, comments, or field values from any of your timesheets, even future ones.
To copy timesheet data:
-
- Click the
 icon located in the top, right-hand corner of the destination timesheet.
- Click the
![]()
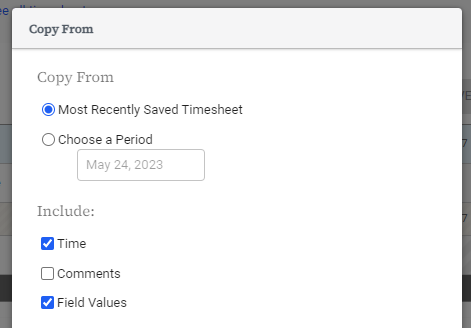
- Select what timesheet and data to copy, and whether or not to overwrite rows in the destination timesheet.
Most Recently Saved Timesheet refers to the last timesheet you saved, which could be a future timesheet, not your most recent previous timesheet. If you want to copy a different timesheet, click Choose a Period, and enter a date that falls within the timesheet period you want to copy.
- Click Copy From.
FAQs
I copied a timesheet, but the values I copied changed after I copied them. Why?
Changes you make in the original timesheet will be copied to the destination timesheet as you make them, up until you first edit the destination timesheet.
Why don't I see the ![]() icon?
icon?
Your timesheet template may not have the copy option enabled, or you may be using a later version of the product that allows copying via a Quick Fill With button.
How do I add comments related to time entries?
Are you using a later version of Replicon?
If your interface looks different than this, check out the How do I add comments related to time entries? help topic.
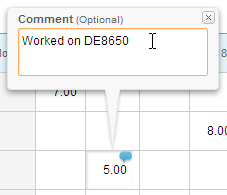
You can include a comment for each entry in your timesheet. In the comment, you can include the details of what you worked on.
Entering comments in a duration-based timesheet
To enter comments, click a cell to open the bubble and enter your comment.
Your comment will automatically be saved when you save the timesheet. Click the ![]() in a bubble to minimize all bubbles, and
in a bubble to minimize all bubbles, and ![]() to maximize them.
to maximize them.
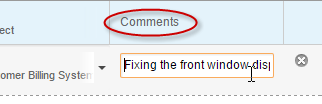
Entering comments in an in/out timesheet
To enter comments, enter them directly in the Comments column.
FAQs
Do I have to include comments?
Including comments on your timesheet may be required – if this is the case, you must enter a comment for each time entry before you will be allowed to submit your timesheet.
What kind of comments should I include?
Comments can be used to record various things – a common usage is to record what activities, projects, or changes you worked on that day, if you don’t enter time against specific tasks.
How do I delete comments?
To delete a comment, click inside the cell to expand the comment, then select and delete the comment text.
Adding, deleting, and copying timesheet rows
Are you using a later version of Replicon?
If this field looks different on your timesheet, see the Adding, deleting, and copying timesheet rows help topic instead.
If you work on more than one project, task, or activity, you may need to add rows when entering time in your timesheet. You might also want to copy rows to save time, or delete rows you don’t need anymore.
Adding a row
In a duration-based timesheet
In legacy duration-based timesheets, click the ![]() icon at the top of the timesheet table to add a row; clicking
icon at the top of the timesheet table to add a row; clicking ![]() for a row will duplicate that row.
for a row will duplicate that row.
In an in/out timesheet
If you use an in/out timesheet, a row for each day in the timesheet period will display by default, and you cannot delete these rows. You can, however, add rows within each daily row for recording your work times and breaks.
In legacy timesheets, click the Time Entry link to add a row.
Copying a row
In a duration-based timesheet
You may want to copy a row if, for example, you want to use some of its settings for a different project or task, or use the same task with a different activity or billing option selected.
In legacy duration-based timesheets, clicking the ![]() icon for a row will duplicate that row.
icon for a row will duplicate that row.
The new row will be automatically sorted into the correct position. Everything saved to that row except hours and comments will be copied.
Time must be entered in a row for it to be saved.
You can't copy a row in legacy in/out timesheets.
Deleting a row
You can delete a row that has time entered in it, though a prompt will appear asking you to confirm that you really want to delete that data.
In a duration-based timesheet
To delete a row in a duration-based timesheet, click the ![]() icon for the row you want to delete.
icon for the row you want to delete.
In an in/out timesheet
You cannot delete daily rows in an in/out timesheet, but you can delete time entries that display within daily rows.
In legacy timesheets, click the ![]() icon to delete a row. You may need to click on the row or move your mouse over the entry to see the icon.
icon to delete a row. You may need to click on the row or move your mouse over the entry to see the icon.
Using the stopwatch to track time as you go
Are you using a later version of Replicon?
This feature is only available on our legacy timesheets. It is not available in the configurable timesheet format.
If you want to keep a precise record of how much time you spent working on a task, you might want to use the stopwatch feature, if it is available in your timesheet. Once you start the stopwatch, it continues recording time until you stop it, even if you leave the timesheet page or log out of Replicon.
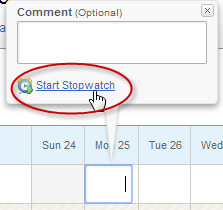
To use the stopwatch:
- Click a cell for the current day.
- In the Comment bubble that displays, select the Start Stopwatch link.
- When you want to stop recording time, click the timesheet cell.
- If you want to add more time for that task, click the Start Stopwatch link again.
The stopwatch keeps a running total for each cell. For example, if you stop recording time, then later start the stopwatch in that cell again, the stopwatch will add time to the previously recorded amount.
FAQs
Why is the stopwatch only available in certain cells?
The stopwatch only appears in each cell of the current day.
How can I change stopwatch’s time format?
You can change the time format that the stopwatch uses by updating your settings.
Banking overtime
Are you using a later version of Replicon?
Overtime banking is only available in legacy products. If you're using a later product, you should have access to time off in lieu functionality, which is very similar to time banking.
Looking for information on our banks feature?
For information on using our banks functionality, refer to Tracking your bank adjustments and balances.
You may be able to bank overtime hours you work, and use those hours to take time off later. Depending on how your Replicon Administrator has set up your timesheet:
- You may be able to choose whether you want to bank overtime hours, or
- Your overtime may be banked automatically when you save your timesheet
Overtime is banked against your Banked Time time off type. Banked hours can be used just like any other type of time off.
Your overtime hours are always banked at your overtime rate. For example, if you are paid time and a half (1.5x your regular rate) for overtime and you bank two overtime hours, three banked hours will become available for you to use.
Choosing to bank overtime
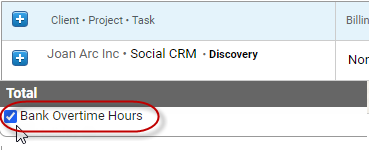
If you can choose to bank overtime hours, you’ll see a Bank Overtime Hours check box at the bottom, left-hand corner of your timesheet.
To bank overtime you’ve worked:
- Enter all hours in your timesheet.
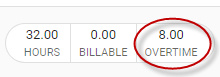
- Check the hours summary bar in the top, right-hand corner of your timesheet to confirm overtime hours are available to bank.
- Enable the Bank Overtime Hours check box.
- Click Save.
All overtime hours in your timesheet will be banked. Any additional overtime hours you save in your timesheet after enabling Bank Overtime Hours will also be banked.
About automatic overtime banking
Your administrator may have set things up so that some or all of your overtime is banked automatically when you save your timesheet.
If all of your overtime is automatically banked, you will have no Bank Overtime Hours check box, and all overtime hours you enter in your timesheet will be banked automatically when you save it.
If only some of your hours are automatically banked, a Bank Overtime Hours check box will appear in your timesheet, but it will only apply to certain overtime hours, as defined by your administrator.
For example, your administrator may have specified that all hours you work beyond 10 in a day are banked automatically, while you have the choice to bank any hours you work between 8 and 10 in a single day.
FAQs
Will my banked hours ever expire?
Not typically. In most jurisdictions, your employer must pay you for any banked hours you do not use. Talk to your supervisor if you have questions about using your banked overtime.
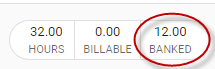
How can I see how much overtime I’ve banked?
Check your time off balance for the Banked Time time off type.
How soon can I use hours I’ve banked to book time off?
Banked hours are available to use as soon as you save your timesheet.
Related topics
How do I correct my timesheet after I've submitted it?
Entering time in a duration-based timesheet using Replicon Mobile
Timesheet tour
Choosing which timesheet is shown by default
Do I have to select a project or activity?