Requesting project resources
Most resourcing workflows involve allocation of resources to projects.
While allocation can be carried out directly, it is usually request-based, meaning it involves a project manager sending a resource request to a resource manager, that they then fulfill.
Resources must either be allocated to a project, or allowed access to it, before they can be assigned to specific tasks and enter time via timesheets or SmartBeats for that project.
Only project managers with the following permissions assigned in their project manager permission set will see cost data in requests:
- Cost Data for Projects
- Hourly Cost for project Team Members
Request-based allocation workflow
To allocate a resource, a project manager submits a request to their resource manager, specifying what role they need filled, how much of the resource’s time will be required, and any other requirements. Then, the resource manager will suggest one or more resources to fill this request, and the project manager can either accept or reject their suggestions.
You can also release a resource from all or part of an allocation at any time.
If you want a user to record time against a project, but you don’t need to define the amount of time they spend working on it, you can allow them access without submitting a resource request and adding that user as a project resource. Users allowed access in this way cannot be assigned as task owners.
To add resources to a project:
- Select Projects > List > choose the project > click the Resourcing > Resource Plan tab.
Then, click Edit in the top, right-hand corner of the page.

- Click the
 icon located at the bottom, right-hand corner of the page.
A panel (or drawer) opens.
- Specify the criteria you need the resource to meet. Refer to Selecting resource criteria below for more information.
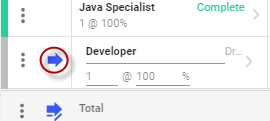
- Click the
 to submit the request. The status of the request will update from Draft to Submitted.
The resource manager will be notified, and will propose resources to meet your request. Once they’ve done this, the row in your request will update with the names of the proposed resources, and will be marked as Proposed.
- When you receive notification that the request has been fulfilled, return to the project’s Resourcing tab, and again click Edit.
- Review the proposed resources, and accept or reject them, by clicking the
 or
or  icon, respectively.
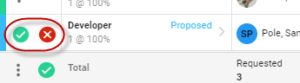
If you accept, the request is marked as Complete, and the resource is available to work on your project for the alloted timeframe.

If you reject, the request is marked as Res Rejected, and is sent back to the resource manager, where they can update the request and propose new resources.
Selecting resource criteria
You can specify the role, number of users you want, percent time allocation (loading), group membership, and time span for the allocation.
|
Role |
Choose the role you want the allocated resource to be assigned.
|
|
Skill requirements |
The skill or skills you'd like the resource to possess; you can set a skill rating for each. If you select a role, this field will update to use the default skills for that role, though you can add, remove, or change ratings for these skills. |
|
Group requirements |
If you'd like the resource to belong to one or more specific groups or resource pools, select them here. For example, if you’re allocating a regional salesperson for a project, they’ll likely need to work in a particular location. Or, if you want a consultant from a certain vendor, you could request the resource pool for that vendor. |
|
Tag requirements |
Ad hoc tag or tags you'd like the resource to have assigned to them. For example, you might want a resource for a task that requires travel to have a Ready to Travel tag assigned to them. Note that tags must first be defined and assigned to resources for this criteria to be useful. |
|
Start and End Date |
The first and last day you require the resource/s to work on this task |
|
# of resources |
Update the number from 1, if needed.
You can include more than one resource in a single request; however, note that you’ll have to either reject all or accept all resources suggested on a single request. So, it’s sometimes a good idea to only include one resource per request.
|
|
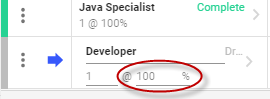
Loading |
Update the percentage allocation, if needed.
This specifies the percent of a standard resource’s time that you want allocated to this project. This assumes a 40 hour work week; however, resources with different schedules won’t be automatically ruled out (i.e. a 20 hour a week could still be allocated to a 50% project full time.) |
| Total Requested Hours |
= Number of weekdays in the date range * 8 hrs/day * # of Resources * %Loading This field updates automatically based on the values you enter. |
| Requested Cost Rate |
The desired resource cost rate. If you've selected a role, this field will default to that role's default rate, but you can update it. |
|
Total Requested Cost |
= Total Requested Hours * Requested Cost Rate This field updates automatically based on the values you enter. |
|
Any additional information you'd like the resource manager to know about the request |
Setting the importance of request criteria
When you specify the criteria you desire in a resource, you'll probably find that you care more about certain criteria than others.
For example, you may really want a resource with a certain skill – like C# programming – but you don’t really care what their precise role is. Or, maybe the resource you’re after absolutely has to be located where your team works, but an exact skill match isn’t that important.
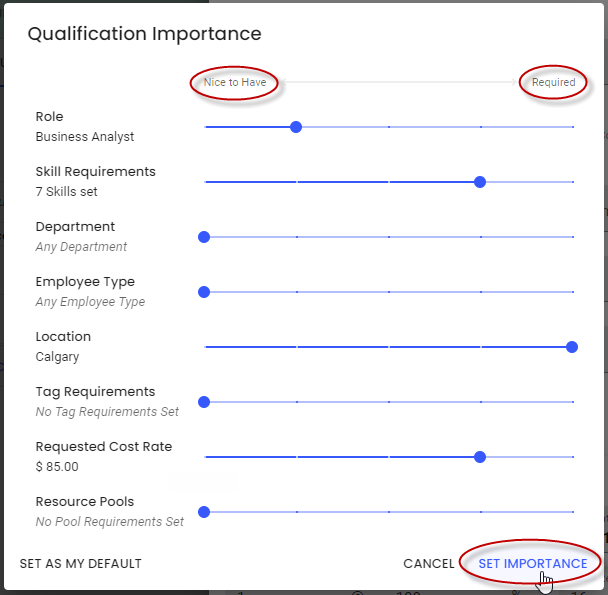
To communicate the relative importance of each criterion to the resource manager, you can set the following importance levels for the request using a 5-point sliding scale from Nice to Have to Required:
- Role
- Skill
- Requested Cost Rate
- Group (department, location, employee type, resource pool)
- Tag
Then, SmartMatch will take your importance ratings into account when ranking possible candidates for the role.
To set importance levels for a resource request:
- Within a project, go to the Resourcing > Resource Plan, and click Request Resources to open the request criteria drawer.
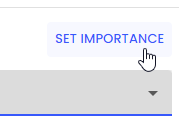
- Click Set Importance.
- Move the sliders to set the relative importance of each criterion for this request.
Releasing a resource
If you no longer need a particular resource allocated to your project, or another project needs them, you’ll need to release them from your project. You can choose to release resources immediately, or as of some date you choose in the future.
Once released, the resource will no longer be assigned to tasks for the project.
To release a resource:
- Click Edit in the top, right-hand corner of the page.
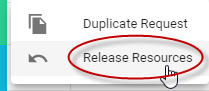
- Go to Resourcing for the project, click the
 icon for the request in question and select Release Resources.
- Click the check box for each resource you want to release.
- Choose:
-
- Release Entirely to remove them completely from the project., or
- As Of and pick a future date when the resource will be released.
- Enter a comment, if desired, and enable the I confirm check box, then click Release.
FAQs
What happens if no resources are available that match the criteria I selected?
Your resource manager will still attempt to propose resources, even if they can’t provide an exact match.
Is there a way to indicate to the resource manager why I’m rejecting a resource?
Not currently. You can speak to them directly, if needed, or follow up with a new request that includes a comment.
Can I request a specific individual?
You can include requests for specific individuals in the Comment field of the request. Or, you can contact your resource manager through another channel.
Can I request a resource who’s allocated to another project at that time?
Resources who are already allocated will need to be released from their current allocation by the resource manager. You can contact the resource manager directly about this.
Can I reject one of two suggested resources, and accept the other?
No. Acceptance, or rejection, of each suggestion is all or nothing. If you think you might want to reject one resource, but accept another, include them using two separate requests.
How do I assign a resource to a task? Do I need to submit a request?
No. Once a resource is allocated to your project, they’ll be available to assign to tasks within it. You won’t need to submit further requests for that resource.
What’s the difference between unsubmitting and removing a request?
You can unsubmit or remove any request that hasn’t yet been fulfilled by clicking Edit at the top of the page, then clicking the ![]() icon next to the request.
icon next to the request.
- Unsubmit retains the role and time selected, but removes the request from the resource manager’s page
- Remove deletes the request row completely
How do resources know what they’ve been allocated to work on?
Resources can view what projects they’re allocated to using the calendar in their profile. Within a project and tasks date range, they can also see the projects and tasks they're allocated to in their timesheets and in their SmartBeats UI.
Related topics
All about resourcing
Setting up resource profiles
Fulfilling resource requests
Using Quick Allocation to add, edit, and view resource allocations
Can project managers allocate resources to projects directly?