Can project managers allocate resources to projects directly?
Some smaller organizations don’t have a dedicated resource manager. In these companies, project managers (PMs) may be allowed to pick their own resources for projects directly.
To allow this in Polaris, you must assign these managers PM permissions AND resource manager (RM) permissions, so they can both access projects and allocate resources.
With both permission sets assigned, a manager can:
- Allocate resources directly from the Resource Plan tab
- Add, edit, or delete resource plans
- Compare actual hours worked to allocated hours, for each task
Allocating resources from the Resource Plan tab
There are two ways PMs with RM permissions can allocate resources via the Resource Plan tab:
Using a shortcut to the resource allocation page
Managers can access request fulfilment features like SmartMatch without having to submit a resource request, or navigate back and forth between the projects and resource allocation sections of the app.
To add an allocation from the Resource Plan tab:
- Go to Resourcing > Resource Plan.
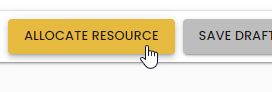
- Click the Request Resources link:
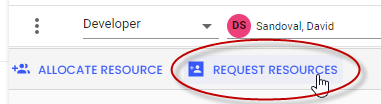
Or, click the Resource Request button:

A request panel displays.
- Enter any requirements you have, such as the role and date range.
- Click Allocate Resource.
You'll be taken to the request matching page where you can fulfill the request yourself.
Directly choosing a resource to allocate
If managers don't need advanced features like SmartMatch, or if they already know exactly who they want to allocate, they can skip visiting the resource allocation page altogether, and directly choose a resource.
To do this:
- Go to Resourcing > Resource Plan.
- Click the Allocate Resource link.
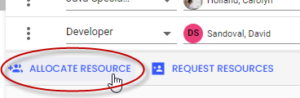
A new row will display at the bottom of the list of allocated resources.
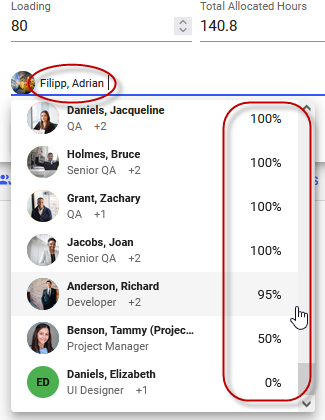
- In the dialog that displays, choose the resource you want to allocate, and the allocation start and end dates.
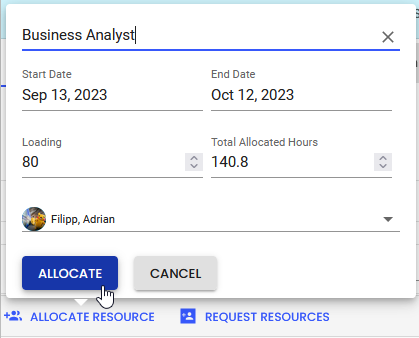
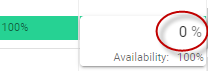
You can use the availability percentages given for each resource to guide your selection. You can also type a resource's name in the field to search for users who don't appear in the short default list.
You can also choose a role, and adjust the % loading for the allocation, if necessary. The total allocated hours will automatically update, though you can manually adjust that value, too.
- Click Allocate.
If the resource you select has availability conflicts with the proposed allocation, a dialog showing SmartFit options will display. Refer to Handling availability limitations when allocating resources to a project for more information about these options.
Adding, editing, or removing allocations in resource plans
PMs who also have RM permissions can add, edit, and remove allocations via a project’s Resource Plan tab. Refer to the table below for information.
View Requesting project resources for information on other features of the Resource Plan tab.
|
Editing an allocation |
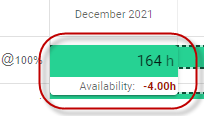
You can edit the amount for any allocation that already exists, of any status, on the Resource Plan page. To do this, click an allocation, and update the hr/% value.
You can see how the resource’s availability is impacted by your change directly below the edited field. You can also extend or shorten an allocation’s date range by clicking and dragging the
Hours will automatically populate the new range, based on the resource’s availability. |
|
Adding an allocation |
You can add an allocation for any resource who already appears in your resource plan. If you need to add an allocation for a different resource, you’ll need to click + Request Resource, and allocate that resource. You can’t add allocations outside a task’s date range; The white background shows the date range. To add an allocation:
If the resource you select has availability conflicts with the proposed allocation, a dialog showing SmartFit options will display. Refer to Handling availability limitations when allocating resources to a project for more information about these options. |
|
Removing an allocation |
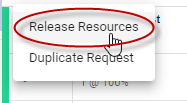
To remove all of a resource’s allocations for a row, click the
To remove individual allocations, click the allocation and set the value to 0. The allocation bar may still display, but won’t contribute to the total.
|

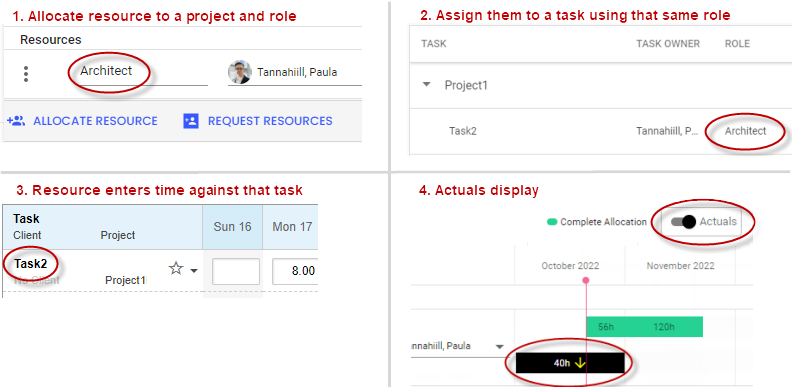
Viewing actual hours worked on the Resource Plan tab
You can compare actuals and allocations to estimate whether the project will be completed on time or cost more than planned.
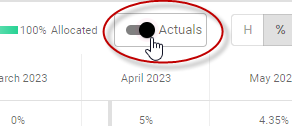
To display actual hours recorded in timesheets (or via SmartBeats):
- Go to Resourcing > Resource Plan.
- Turn on the Actuals toggle.
The actual hours will display on a black entry, beneath the corresponding allocation.
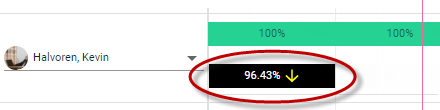
The ![]() arrow indicates the resource has worked less than their allocated hours, while the
arrow indicates the resource has worked less than their allocated hours, while the ![]() arrow indicates they've worked more than their allocated hours.
arrow indicates they've worked more than their allocated hours.
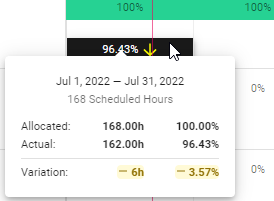
To see the actual and allocated hours for that period, and the difference between the two, click the actuals entry.
You can keep the actual hours toggle off to reduce clutter on the page.
FAQs
Why aren't actuals displaying for a resource?
Actuals are tracked for time entered against tasks and roles. For actuals to display for a task’s hours, the resource entering that time must be allocated to the same role as is used for their task assignment.