Managing your team's time punches via the web app
Your direct reports may have the ability to create time punches using a CloudClock, Replicon Mobile, the Replicon web app, or another device. You can review and correct your employees’ time punches using the Replicon web app.
There are several reasons why you might have to view your reports’ punches – refer to Managing your time punch team for details on supervisory responsibilities that might necessitate this.
There are several ways of viewing punches. You can:
- View punches on a map
- View the image and location for a single punch
- Correcting punches
- View an audit trail of punches and changes made to them
You can also manage punches from within the Replicon Mobile app.
Viewing punches on a map
If you required a location to be recorded with punches, you can view where employees were when they created their punches on a map.
Typically, you’d do this to ensure employees are at their work location when they create punches. To help you identify whether or not users were out of range, your administrator may have set up ‘places’ in Replicon.
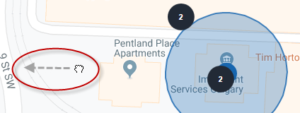
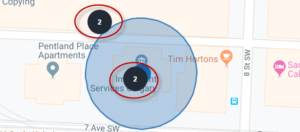
Places are geographical ranges, typically your organization’s work sites, that are defined by virtual fences – sometimes known as geofences – that are assigned to punch employees. They display as blue, transparent circles on punch maps, so you can easily identify punches that fall outside the user’s assigned place.
Supervisors can visually identify whether punches fall outside of a place. Or, if your reports have been assigned places and the location validation rule, invalid punches that were made outside of the user’s location will be flagged.
To view punches on a map, go to Team > Time Punches, select the Map toggle.
Navigating the map
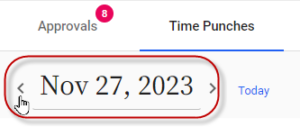
You can choose the day you want to view by clicking the date control arrows.
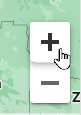
Click the + and - toggles to zoom in and out.
Click and drag to move the map.
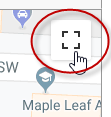
Click the ![]() icon to show a full-screen view.
icon to show a full-screen view.
Viewing punches and places
Places defined in your system are defined by blue circles.
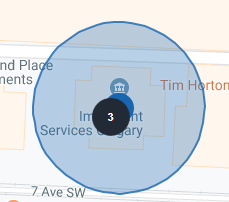
Punches made that day by those you supervise are shown by black circles. Punches that are close together, dependent on the zoom level, will consolidated into a group, with the number of punches shown in the middle.
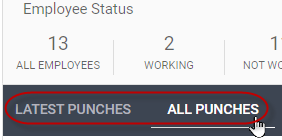
To view all punches for users you supervise that were made that day, click All Punches. To view only the last punch for each user you supervise, click Latest Punches.
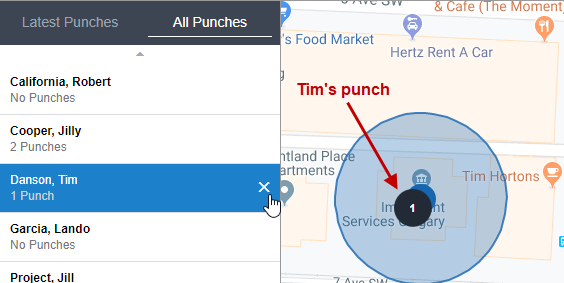
To view only punches made by a single user, click the user’s name. To return to the list of all users, click the x.
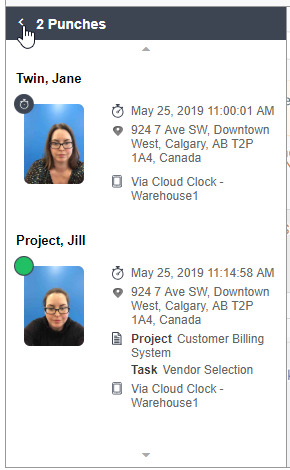
Viewing punch details
To view who made the punch, and the type of punch, hover over a punch or a group of punches. To view the punch image, date, time, address, type, and device type for punches, click Click here for more.
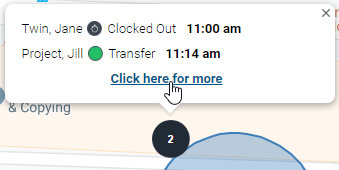
Details will display in the panel on the left. Click the left arrow to return to the simple list view.
Filtering by in/out status and validation errors
You can click the filters above the map to limit which users and punches display.
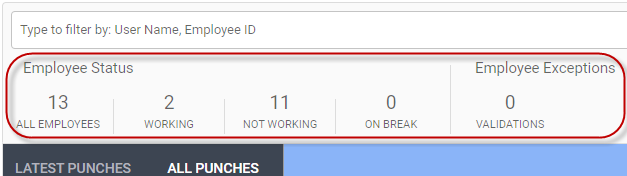
The options are:
- All Employees - shows punches for all your punch reports
- Working - shows all punches for employees who are punched in and not on a break
- Not Working - shows all punches for punched out employees, not on a break
- On Break - shows all punches for users on a break
- Validations - shows only punch validation errors, so you can easily identify these
Viewing a single punch's image and location
Depending on the user’s punch entry policy settings, a photo may be take of the employee each time they create a punch. The location where the punch was made may also be saved. You can view these images and locations to confirm that ‘buddy punching’ hasn’t occurred, and the employee was at the expected location when they punched.
To view punch images and locations:
- Go to Team > Time Punches.
- Select the date you want to view using the date field located at the top of the page.

- To view punch images, click the Images toggle, located in the top, right-hand corner of the page.
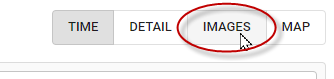
If an image was recorded for a punch, it displays above the punch time.
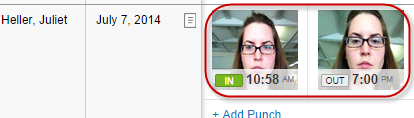
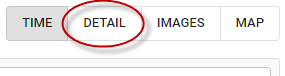
- To view punch locations, click the Detail toggle.
If a location was recorded for a punch, it displays under the punch time along with the name of the clock.

Correcting punches
Employees may occasionally forget to punch in or out. If you know your direct report was in fact present when they missed a punch, you can add a punch for them. You can also correct or delete punches that you know are inaccurate.
Adding a punch
To add a missed punch:
- Go to Team > Time Punches.
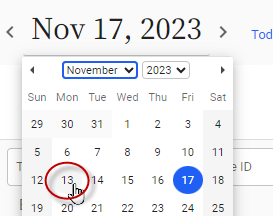
- Select the date you need to add a punch for. You can click the arrows beside the date at the top of the page.
Or, click the date itself, and select a day from the calendar that displays.
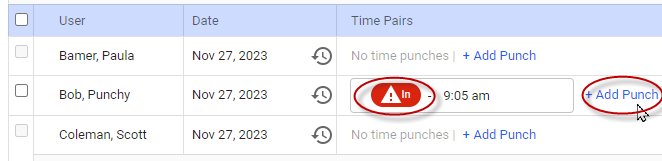
- Find the employee you need to add a punch for. Use the filter, if necessary.
- In the Time Pairs column, click the Add Punch link. Or, if you need to add a missing punch from a time pair, click the red In or Out icon for that pair.
- Enter the time of the punch, its type, and the date, if necessary. And, select an activity, project, or task for that time to be recorded against, if applicable.
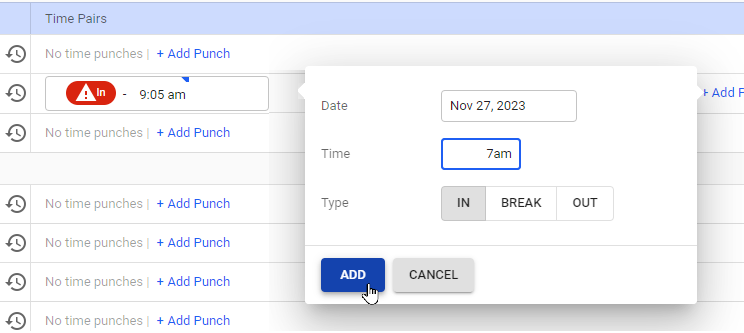
You can't select a billing rate when adding a punch for project or task work via the web app. If multiple billing rates are available for the project selected, the first one alphabetically will be assigned by default.
- Click Add.
The new punch displays.
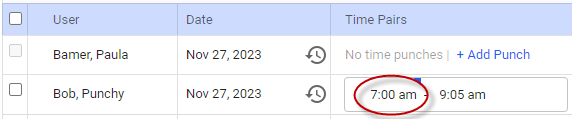
Editing or deleting a punch
To edit or delete a punch:
- Go to Team > Time Punches.
- Select the date of the punch you need to edit or delete using the date field located at the top of the page.
- Find the employee you need to add a punch for. Use the filter, if necessary.
- In the Time Pairs column, click the punch you want to edit.

An edit bubble displays.
- To edit the punch, update the punch time, date, type, activity, project, or task, and then click Save.

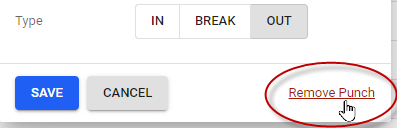
To delete the punch, select the Remove Punch link, and click Remove to confirm.
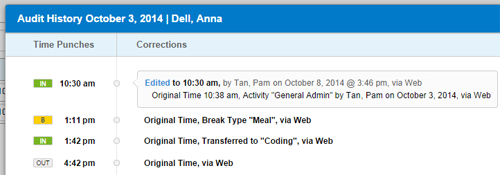
Viewing an audit trail of punches and changes
You can view all punches, along with any edits that were made, who made them, and when. If punches are rounded, you can also see both the original time and the rounded time.
To view an audit trail of punches and corrections:
- Go to Team > Time Punches.
- Select the date you want to view using the date field located at the top of the page.
- Tap the
 icon beside the name of the user whose punches you wish to view.
![]()
A list of their punches for that day displays.
FAQs
Can my direct reports correct their own punches?
They may be able to, depending on their permissions. But most organizations don’t allow employees to edit their own punches.
If we edit the location of a punch, will it’s location validation status update, too?
Yes. And, if a validation is applied after the fact, the punch location will update, but only if the punch is edited.
What time zone is used to display punches?
Punches always display in the viewer’s local time.
Why do some punches show no image?
Image capture may not be required for users, depending on their punch entry policy settings.
What is a ‘transfer’ type of punch?
A transfer punch is one that changes the activity the employee is working on, while leaving them punched in.
What format do I use when entering a punch time?
Simply type digits for the hours and minutes, and then am or pm (for example, 6pm or 830am). Or, enter the value in 24hr clock format (for example, 1800). You don’t need to include any punctuation.
Why can’t I add or edit punches for an employee?
You're prevented from adding and editing punches if the timesheet the punches correspond to has already been submitted. This behavior ensures timesheet pay data stays in sync with punch data. To add or edit a punch, you'll have to reopen the timesheet first, and then resubmit it.
Related links
How time punching works
Managing time punches
Managing your time punch team
Managing your team's time punches using Replicon Mobile
Punching in and out using Replicon Mobile