Adding tax profiles for invoicing
You can create tax profiles for each client you invoice.
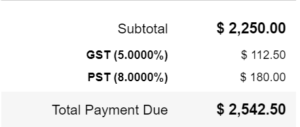
Each tax profile is associated with one or more clients. Then, when you invoice a client, the taxes are automatically calculated and applied to invoice amounts, based on that client's tax profile.
Creating a tax profile for each jurisdiction
You'll likely want to have a separate profile for each tax jurisdiction you work in. For example, if you perform work in Canada, you might create:
- One tax profile for Alberta that includes 5% GST
- One tax profile for BC and Manitoba, that includes 5% GST and 7% PST
- One tax profile for all regions that charge 15% HST
Then, you'd assign the appropriate profile to clients located in each region.
Adding a tax profile
To add a tax profile:
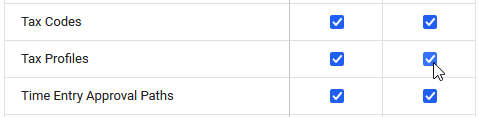
- Check that Tax Profiles permission is enabled in your Administration set.
- Go to Administration > Company > Tax Profiles, and click Add Tax Profile.
- Give the profile a name.
You might want to name it after a particular client or a jurisdiction (e.g. New York State taxes).
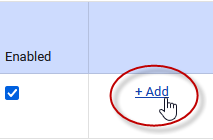
- Click + Add Tax, and a row appears where you can complete the fields for a single tax type. Click + Add Tax again to add more rows, if the profile requires more than one tax type.
You can record a tax registration number for each rate, and choose whether or not it's shown on the invoice
- Click Save.
Now, client managers can assign this tax profile to one or more clients.
Updating tax rates
If a tax rate has changed, or is due to change, you can include multiple rates with unique effective dates by clicking + Add.
Then adding the details of the new rate
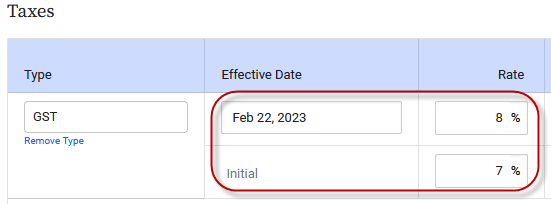
Rates effective only in the past are hidden, unless you enable the Show Past Rates option.

Assigning tax profiles to clients
You can only assign one profile per client, so be sure to include all relevant taxes in the profiles you assign. You can assign each profile to multiple clients.
To assign a tax profile:
- Click Clients in the side menu.
- On the List tab, click the name of the client you want to assign a profile to.
- Click the Edit button.
- On the Summary tab, click the
 icon beside Billing.
 - Click the Tax Profile field, and select the appropriate profile.
- Click Save.
Related topics
Setting up invoice templates
Invoicing a client
What's the difference between tax profiles and tax codes?