Invoicing a client
Once you’ve created a bill, you can issue it to the client – via email, or you can print and mail invoices.
To issue an invoice:
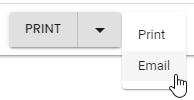
- Go to Financials > Billing & Invoicing, and select Transactions; Or, go to Projects, choose a project, and click the Billing & Invoicing tab. Then, click the Edit button located at the top, right-hand corner of the page.
- Click the
located next to ADD PAYMENT for the bill.
- Select Print, to check the invoice before emailing, or to print it.
The invoice should display, using the invoice template selected for that bill. Use your browser’s print functionality if you want to print the document.
- Select Email Invoice to email it.
A default message will display, sent from your Polaris email address. The email includes the URL of the invoice, that your client can copy and paste. You'll need to add the recipient address, and you can update this message, as desired.
- Once you’re ready to send the invoice, click SEND.
Print and email options are also available at the bottom of each bill.
FAQs
What if we make a change that alters available billing amounts after they’ve been invoiced?
For example, say you update a contract after you’ve invoiced a customer, or you make a correction to a timesheet that changes an amount that was already billed.
In these cases, you don’t need to send a correction to the client. The billing system will simply recalculate the amount the client owes, and add an adjustment to the system to account for any change. This could be a debit delta, or a credit delta, that you can apply to the client’s next bill, like any other billable amount.
Is there an Invoiced status?
Yes, there is an Issued status, applied to any bill that has been sent to a client, either by printing or emailing. You can filter all bills by this status on the Transactions page.


