Recognizing revenue
Typically, revenue managers review and confirm recognized revenue on a monthly basis, to keep their books up to date.
Setting up revenue recognition
There are two prerequisites for confirming your revenue:
Ensure each billable project in your system has been assigned revenue policy.
Choose your revenue recognition starting month.
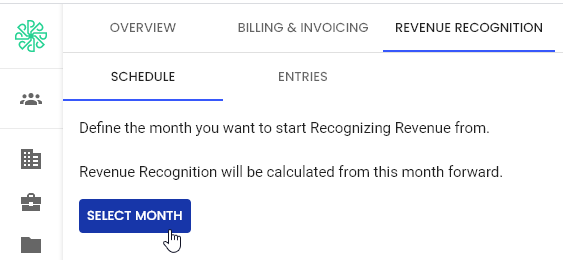
To choose your starting month, go to Financials > Revenue Recognition > Schedule.
- Click the Select Month button, and choose your start month.
- Record any previously recognized revenue for each project, if you’ve been tracking revenue in another system.
Previously-recorded recognized revenue is included in your first revenue recognition month.
Confirming revenue
Revenue recognition is always carried out using your system’s base currency, though revenue recognition policies can be set up using any currency.
To confirm revenue:
- Go to Financials > Revenue Recognition > Schedule.
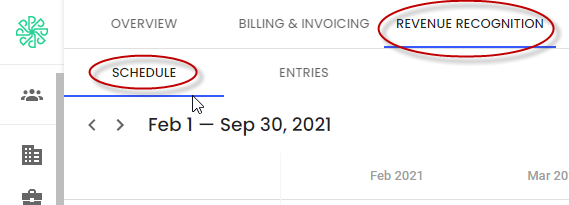
Revenue data will be automatically calculated and display on this page for all projects that have been assigned a revenue recognition policy.
- Confirm the recognized values are accurate.
You may need to check the status of projects in Polaris, or contact project managers for more information on their projects, if numbers look off.
On the month-view page, it says my data is old. What does this mean and when should I refresh data?
Whenever you visit the month-view page, a message showing how old that data is will display.
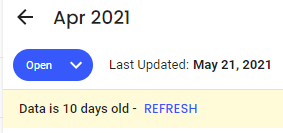
Data on the month-view page will not update automatically when hours are added to projects, or other changes are made, so you can control what data you’re viewing, when you review revenue recognition amounts.
For example, if data updated in real-time, and you reviewed a certain project’s data and considered it confirmed. If a resource adds or removes hours for that project, or you change the project’s resource allocation, you won’t know to confirm that new data before closing your books.
Therefore, we recommend not updating your data after you’ve started reconciling revenue amounts.
About the revenue fields
These are the fields that display on the Schedule page.
|
Revenue Forecast |
The amount of revenue that will be earned based on the existing resource allocation and revenue recognition policies. Forecasts are calculated for all policy types, except for On Invoice policies. |
|
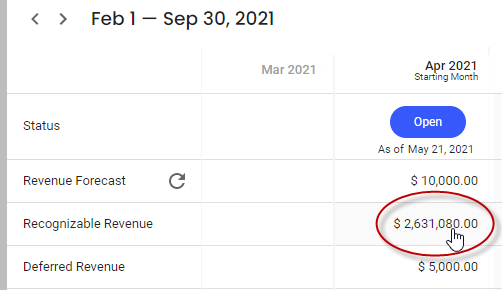
Recognizable Revenue |
Revenue earned that is calculated solely on automatica calculations based on your revenue policy. These amounts cannot be overriden. |
|
Deferred Revenue |
Revenue the revenue manager manually chooses to defer, for that project and that month. Deferred revenue will be available for recognizing the next month. |
|
Recognized Revenue |
By default, this amount is the same as the recognizable revenue automatically calculated for a month. However, revenue managers can override the recognized amount, deferring some revenue for later recognition. |
|
Revenue Variance |
The difference in monthly revenue between the recognizable amount and the amount recognized. |
Deferring revenue
If you can’t confirm amounts before you need to close your books, you can defer them to be included in the following month’s books.
To defer revenue:
- Click any value for that month on the Schedule page:

A page showing all projects for that month displays.
- If you only want to view revenue for one program, client, project manager, or group, filter which projects display by clicking the
 icon in the search field, and selecting options to filter by.
![]()
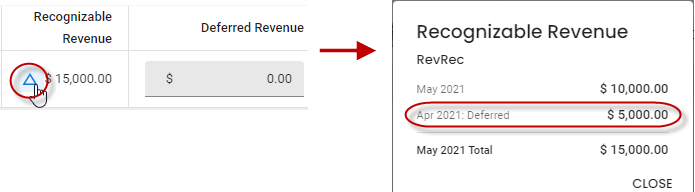
- Enter the amount in the Deferred Revenue field for the project. The value in the Recognized Revenue column will automatically update.

The deferred amount is added to the Recognizable Revenue column for the following month, with a ![]() icon you can click to show the deferred amount.
icon you can click to show the deferred amount.
Closing the books for a month
Once revenue and recognized amounts for all projects in the month is confirmed or deferred, you’ll need to close that month’s books, so revenue amounts become fixed.
To close out a month:
- Click any value for that month on the Schedule page to open the month-view page.
A month-view page showing all projects for that month displays
- Select the Close option from the field located at the top, left-hand corner of the page.
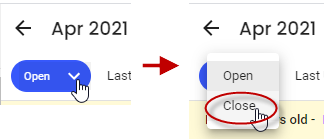
The next month’s books will automatically open.
Once you close the books, you can’t edit any revenue numbers for that month. So, ensure you’ve confirmed everything, and deferred where necessary, before closing the books.
Viewing revenue data
Revenue data is used in planning and forecasting future revenue.
Revenue data is available on the Financials > Revenue Recognition > Schedule page, which shows forecast revenue for future months, along with current revenue amounts.
This data is also available in the Revenue Entry report template. If you want to share this data with a group of users on a regular basis, you can schedule a recurring emailed report.
Ensure any users who need to view data in the Polaris interface are assigned a Revenue Manager permission set with view permission. If they need to view reports, ensure they have a User permission set with Report User permission.
FAQs
What is a revenue manager? We don’t have that role in our organization
You can assign the revenue manager role to the individual who audits or accounts for revenue earned, whatever their title.
What if a project manager changes estimates, start or end dates, or the policy in use for a project?
We don’t recommend changing these things. However, if a change is needed, data for closed months will not update, but all other data will be recalculated based on the new settings.
Can we reopen a closed month?
It is possible to reopen a month, but we don’t recommend doing this since it could alter revenue numbers. Reopening books should only be used as a last resort; ideally, you should address errors by making annotated adjustments to the current month.
What’s the purpose of the Financials > Revenue Recognition > Entries page?
This page shows historical revenue data for all projects, with the option of enabling additional fields with the ![]() icon.
icon.
Using the filters, you can use this page to isolate specific projects, programs, or groups, and view their revenue data over time. You can also export filtered project data from this page.