Entering expenses using the Replicon Mobile app
To enter expenses using the Replicon Mobile app:
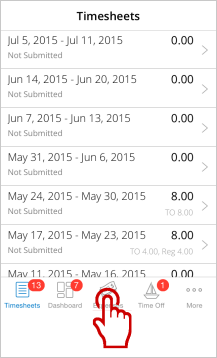
- Log in to the app and tap the Expenses icon.
A list of existing expense sheets displays.
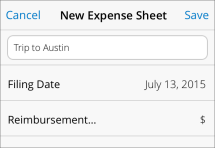
- Tap the + icon at the top, right hand corner of the screen to create a new expense sheet.
- Enter a title and change the reimbursement currency, if needed, then tap Save.
To change the currency, tap the Reimbursement Currency field (which may be displayed as Reimbursement...), select a currency, then tap Done.
- Tap the + icon in the top, right-hand corner to add an expense entry to the expense sheet. Enter the expense details. The fields in your expense entry may be differ slightly depending on your company’s implementation.
-
- Tap Project and Type and select the appropriate options.
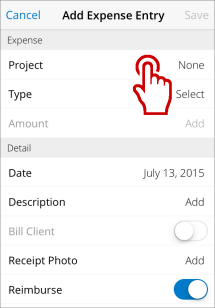
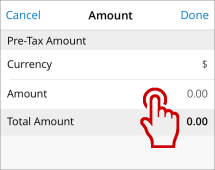
- Tap Amount. Enter the information requested on the screen that appears. The fields displayed will differ depending on the expense type. For example, for mileage you enter a distance, rather than an amount.
- Enter a date, description, and payment method (you may need to swipe up to see all of the fields).
- Move the Bill Client switch to Yes if the expense is to be billed to the client.
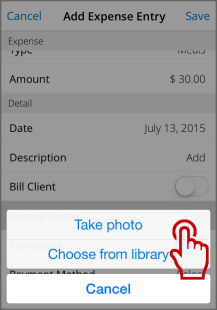
- Tap Receipt Photo to upload expense receipts. If you have the receipt with you, tap Take Photo to take a photo of the receipt and attach it to the expense sheet. Or, tap Choose from Library to choose from photos saved on your mobile device.
- Tap Project and Type and select the appropriate options.
- Tap Save to save the expense entry.
- Tap the + icon in the top, right hand corner to add more expense entries.
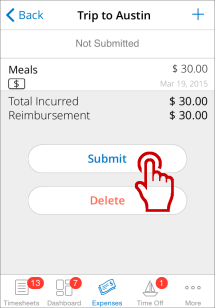
- Tap Submit after you have finished entering your expense entries.
Related links
Using the Replicon Mobile app
What can you do with Replicon Mobile? (video)